Have you ever had strawberry layer cake? We had not, until a friend told us about the delicious cake she had … almost every day … during a recent bicycle tour she guided in Natchez, Mississippi. Apparently it is a famous dessert there, (I’ve yet to visit Mississippi), and she couldn’t get enough of it! When I thought about it, plenty of other strawberry desserts came to mind, like angel food cake with strawberries, strawberry shortcake, strawberries dipped in sour cream and brown sugar, and fresh strawberry pie, but I’d never actually eaten strawberry layer cake! She raved about it, so I decided it was time to give it a try!
This little project turned into three different cakes, four batches of frosting, a batch of strawberry curd and two batches of homemade strawberry purée to get things just right. It was definitely worth it and I think this is finally the perfect combo of light cake with a perfect crumb, luscious strawberry purée reduction and oh so strawberry-tasting buttercream frosting with a hint of cream cheese! This dessert could be fun any time of year, but with the beautiful pink color, I’d say give it most certainly looks perfect for Christmas or Valentine’s Day. And, if you don’t get around to it sooner, how about Easter?
What makes this cake so delicious is that it’s made with real strawberry purée reduction, which gives it a natural and intense strawberry flavor. Of course, if you can find juicy, ripe fresh strawberries, those are ideal, but I found that frozen strawberries were excellent in the strawberry reduction. Simply take one pound of frozen or fresh strawberries or even a combination, cook them with some sugar, sieve out the excess pulp and you have a beautiful strawberry sauce that can be used in both the cake and the frosting, or even all by itself over your favorite vanilla frozen concoction. We love it over frozen yogurt!
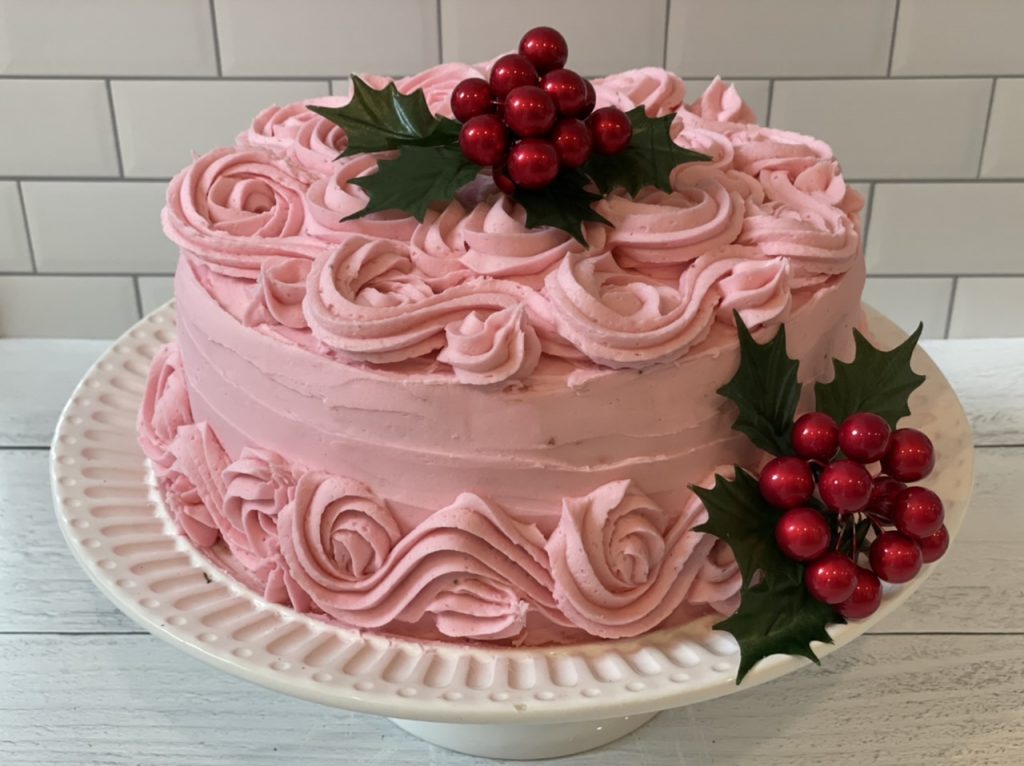
When it comes to making strawberry cake, there is a caveat. Strawberries turn kind of a brownish-gray color when baked in a cake, so you are going to have to add a little bit of food coloring in order to have an appealing cake. It’s best to use gel coloring in baked goods, because it holds its color in the baking and you use much less of it, so it doesn’t interfere with the liquid quantities in the cake. I used Sunny Side Up Bakery “deep pink” squeeze gel color for my cake and frosting. It took about 5-6 drops to get this pretty pink color, but you can adjust for your own personal preference. This gel coloring is available at Hobby Lobby, but Michael’s also carries cake decorating supplies and should have a pretty pink, as well. Also, if you like all of the wavy decorative swirls on the top and sides of the cake, pick up a #824 open star cake decorating tip, the complementary coupler, and a pastry bag.
This cake is not a simple project, but it’s fun and worth the time, especially if you are a big strawberry fan. Be sure to make your strawberry puree reduction ahead of time, so it is completely cooled by the time you make the cake. You can speed the process along by chilling it in the freezer for about 10 minutes, but be sure not to freeze it!
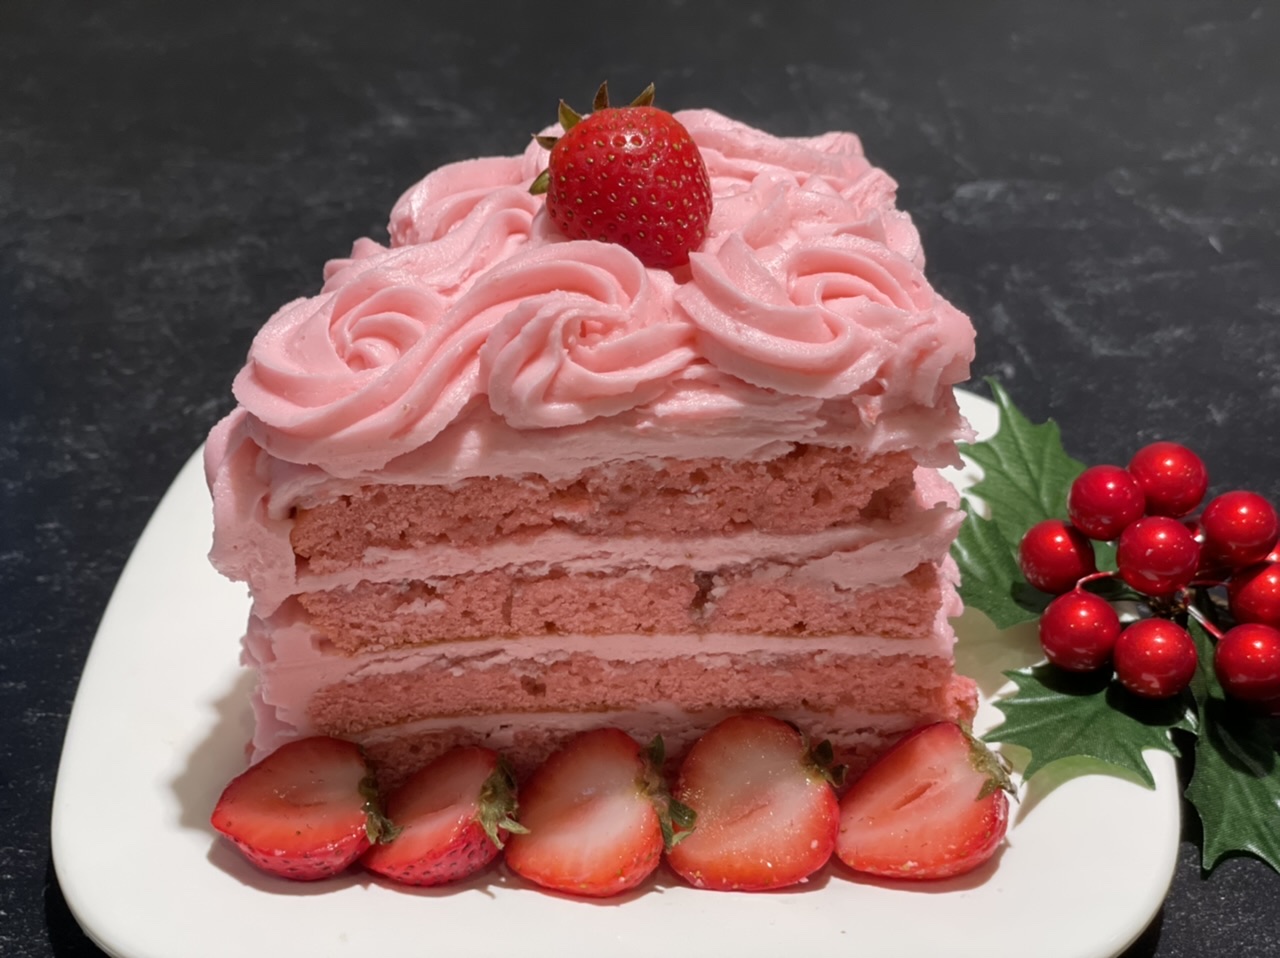
Strawberry Layer Cake with Strawberry Cream Cheese Frosting
Equipment
- Two 9-inch round cake pans
- Pastry bag with #824 tip and the corresponding fittings
- Large serrated knife for cutting the cake in half horizontally
Ingredients
Strawberry Purée Reduction
- 1 lb.
fresh or frozen strawberries, stems removed and quartered
- 3/4 cup granulated sugar
- 2 tsp. fresh lemon juice
Strawberry Cake
- 3/4 cup unsalted butter, softened to room temperature (6 oz. or 1 1/2 sticks)
- 1 1/2 cups granulated sugar
- 2 1/2 cups all-purpose flour
- 1/2 tsp. salt
- 2 1/2 tsp. baking powder
- 4 lg. eggs, at room temperature
- 3/4 cup milk, at room temperature
- 1/2 cup strawberry puree reduction (recipe above)
- 1 1/2 tsp. vanilla extract
- 6 drops pink gel food coloring (5-6 drops, or as many as the color you like requires) We used Sunny Side Up Bakery “Deep Pink” gel coloring, but you can use any pink you love best!
Strawberry Cream Cheese Frosting (this is a double recipe so you have plenty to generously frost and decorate your cake)
- 1 cup unsalted butter, softened to room temperature 8 oz. or 2 sticks
- 4 oz. cream cheese, softened to room temperature
- 8 cups +/- powdered sugar, sifted
- 1 tsp. vanilla extract
- 1/4 cup strawberry puree reduction (recipe above)
- 2 drops pink gel food coloring
Instructions
Strawberry Puree Reduction
- Make this puree ahead of time, so it has time to chill. You can make it several days ahead.
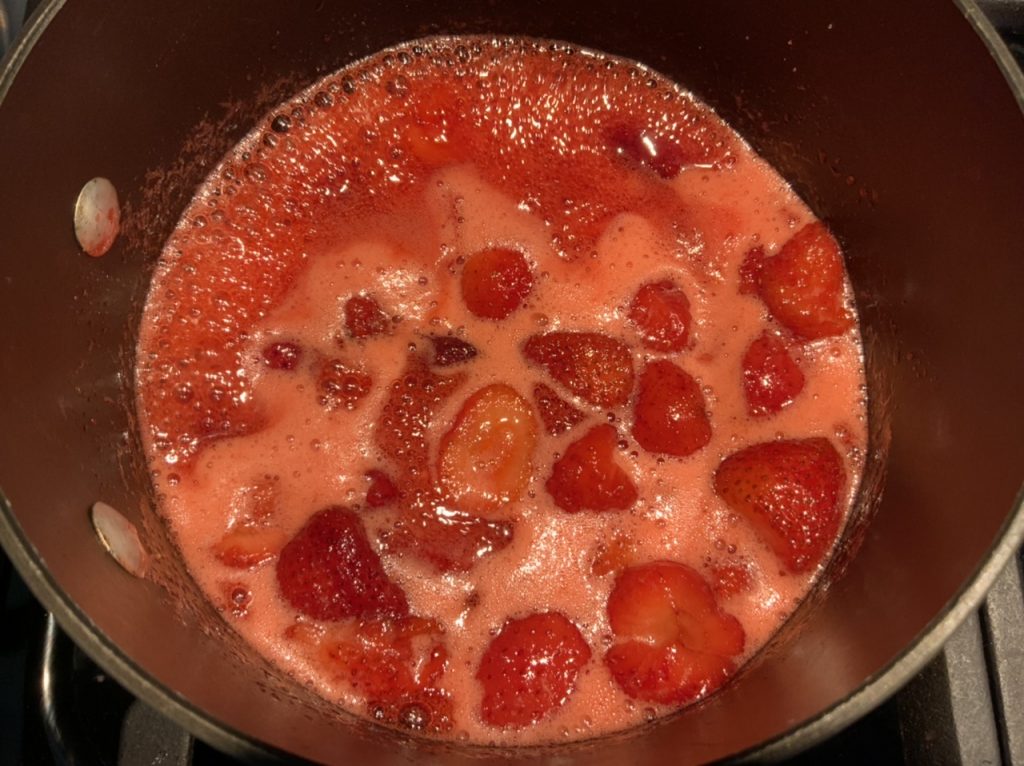
- Place berries, sugar and lemon juice into a saucepan. Slowly bring to a boil over medium heat, stirring frequently. The juices from the berries will create enough liquid to form a sauce. Continue to cook on a low boil for about 10 minutes, or until berries are very soft.

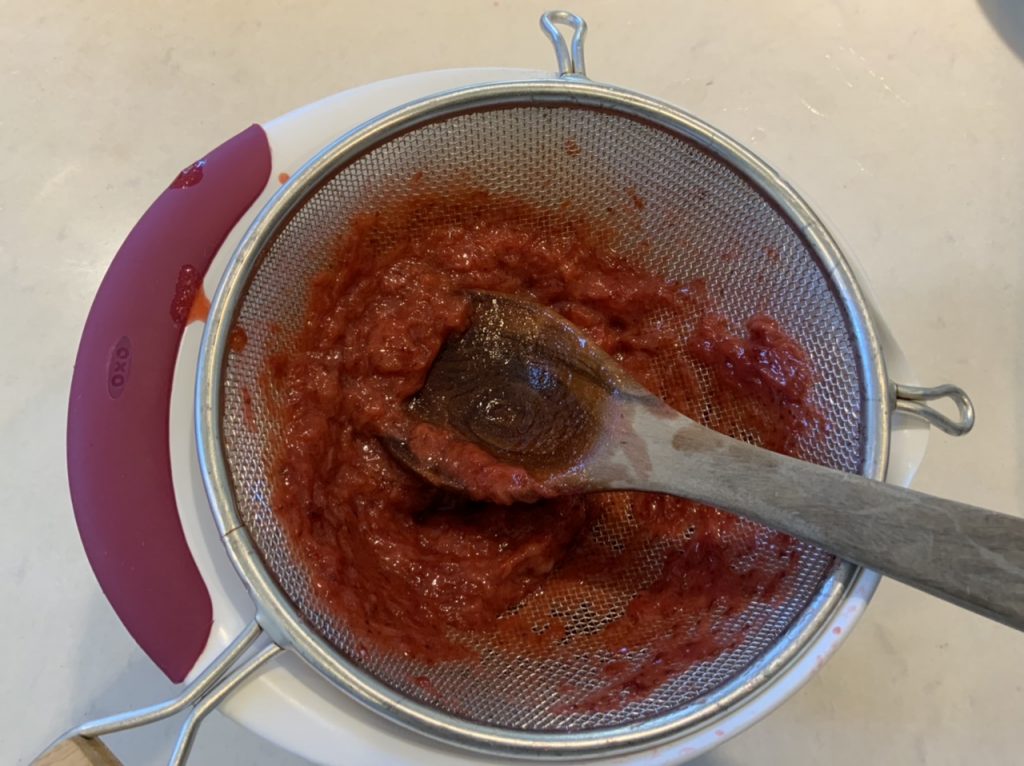
- Remove from heat and strain sauce through a strainer, pressing the solids through the strainer to create a thick sauce or puree. Use a spatula on the bottom of the strainer to capture any strawberry puree that is coating the outside of the strainer. Discard any strawberry pulp that doesn’t get through the strainer.

- Bring the strained puree to a low boil and cook until reduced to about 1 cup of puree, 10 minutes or so. This sauce will be thick enough to coat a spoon. Remove from heat, and cool to room temperature. Use 1/2 cup in the cake, 1/4 cup in the frosting and the rest for spreading on the cut layers of cake before frosting them.
Strawberry Cake
- Butter the bottoms and sides of two 9-inch cake pans and dust with flour. Preheat oven to 350 F.
- Sift flour, salt and baking powder together into a small bowl. In a separate bowl, mix milk, strawberry puree reduction and vanilla extract. Set both aside.
- In a large mixing bowl, or in the bowl of your mixer, place butter and beat on high speed until creamy and light colored. Slowly add sugar and continue to beat until well-integrated and fluffy.
- Add eggs, one at a time, beating well after each. Scrape the sides of the bowl with a rubber spatula as you go.
- Add dry ingredients and liquids to butter mixture, alternately, beginning and ending with dries.
- Divide batter evenly between the two 9-inch cake pans.
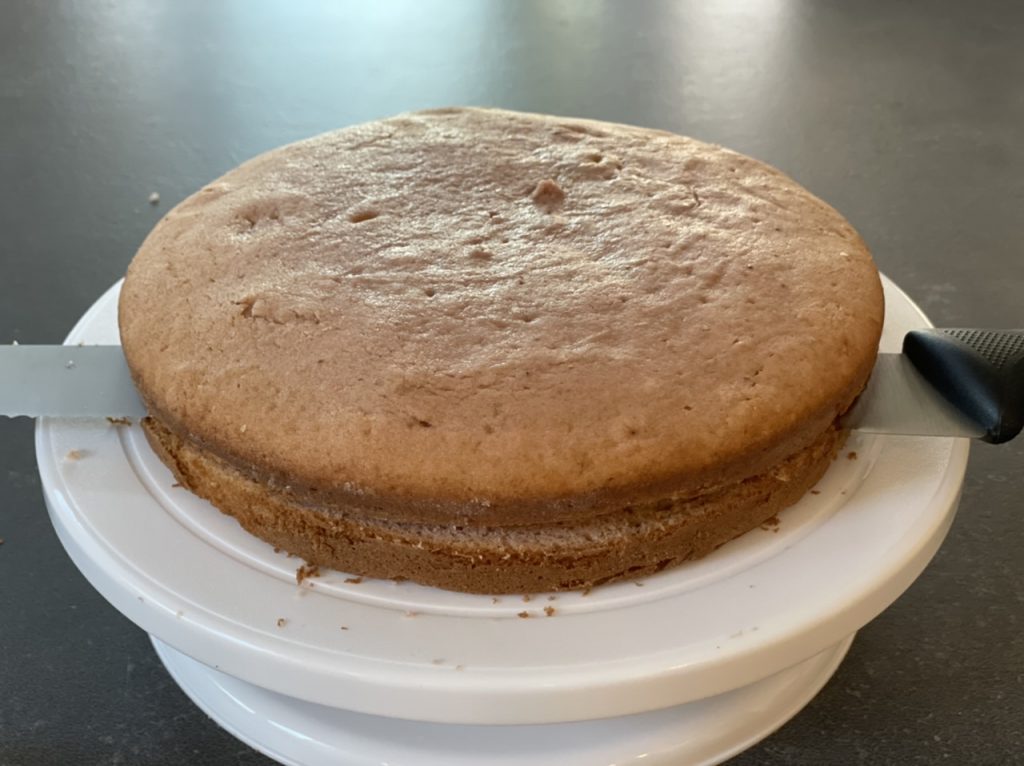
- Bake for about 20-25 minutes, or until a cake tester comes out clean when inserted into the middle of the cake. Remove from oven and cool for about 5 minutes. Then, turn cakes out of the pans and directly onto a cooling rack. Once cool, refrigerate for about 30 minutes and then slice each layer in half horizontally using a long bread knife or a cake slicing knife. (Chilling the cakes makes slicing them a bit easier.) If the cake layers are significantly domed on top, flatten them out by cutting the rounded part off the top using the same knife.

Strawberry Cream Cheese Frosting
- While the cake is baking, begin the frosting. Place softened butter and cream cheese into the bowl of your mixer. Beat until fluffy. Blend in vanilla extract.
- Now alternate adding the powdered sugar (reserve 1/2 cup of the powdered sugar for fine tuning later) and the strawberry reduction puree until both are used up, beating well after each addition.
- If you feel the frosting is too soft, add a bit more powdered sugar, and if you feel it’s too stiff, add a splash of milk or a bit more strawberry puree. Frosting consistency will depend upon the softness and moisture content of the butter, so it’s always good to be a bit flexible when making it! Also, you can totally make this frosting with out the cream cheese, if you prefer.
Assembling the Cake
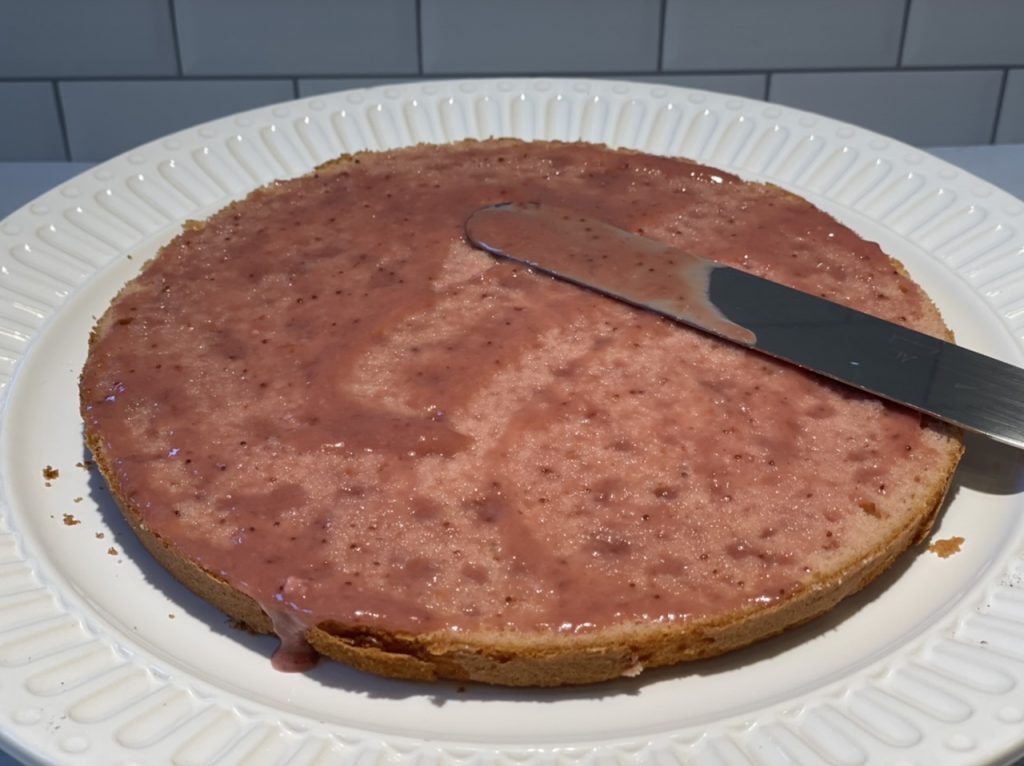
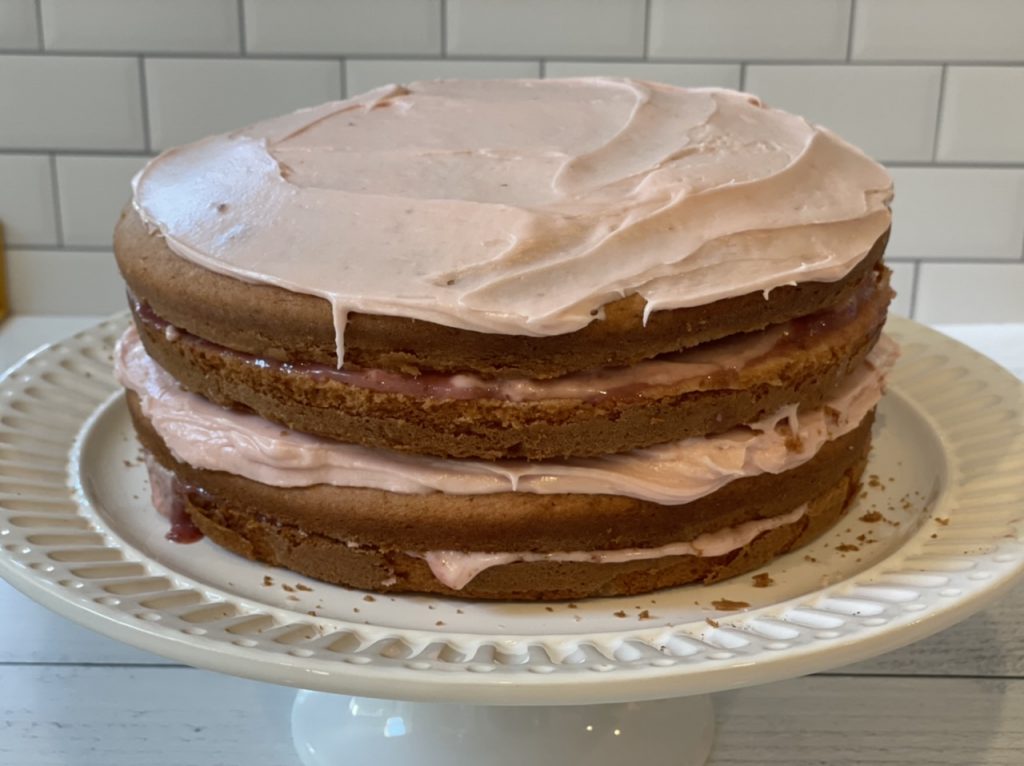
- Take the bottom of one of the cake halves and place it on your cake platter. Spread a thin layer (about 3 tablespoons) of the strawberry puree reduction over the cut side of the cake. Allow that to sink in. Then, add a layer of frosting right on top of the puree.

- Place the top half of that layer right on top of the frosting. Spread more frosting on top of that half.
- Repeat the pattern with the second layer of cake ending with the top of the cake on top!

- When all four cake layer halves are in place, frost the entire top and sides of cake with a thin layer (a crumb coat) of frosting using a frosting spatula, to smooth out the cake and to cover up any crumbs. Then, frost the tops and sides with one more coat of frosting before decorating the tops and sides with the pastry bag swirls.
- Using a #824 open star cake decorating tip inserted into a pastry bag with the matching coupler, start making your decorating pattern using sort of wave-like patterns to cover the top and bottom edges of the cake.

- Serve with a scoop of vanilla or strawberry ice cream. Also, a drizzle of homemade chocolate sauce is delicious on this cake!

Looks so delicious and beautiful! I’m a big fan of strawberry cake!!! The cream cheese frosting goes perfectly with the cake.
This cake is so much fun, but also a lot of work! It’s worth it, though, especially since you love strawberry cake. The strawberry puree reduction is delish all by itself, and it just makes the cake taste like juicy strawberries! We are with you on the cream cheese frosting!
Sometimes you just need a big baking project! I’m loving this gorgeous cake!
And … it was a big project! So happy you love the cake and we hope you get a chance to try it, Anisha!
A little confused about the cream listed in the first part of the directions for the frosting. There is no cream amount listed in the ingredients. I’ll just add it until I get the paste like texture and hopefully that will work.
Hi Heather! Thank you so much for your comment! The “cream” should have been “cream cheese” and you do blend it with the butter first before adding the powdered sugar and strawberry puree. I’m sorry about the confusion of adding the cream cheese after the powdered sugar and strawberry puree. I do have recipes where I add the cream cheese at the end, but it really does not matter in which order you add the cream cheese. Hopefully, the cake turned out well for you! Please let us know!
Would it be OK to use buttermilk in place of just milk?
Hi Bridgette! Thank you so much for your question! I have not made this cake with buttermilk, but because of the acidity in buttermilk, combining it with baking soda can produce the same leavening effect as the baking powder. Baking powder has cream of tartar in it, which is an acidic ingredient, where as baking soda does not have an acidic component, rather it is an alkaline or base ingredient. So, I would follow these guidelines if you prefer to use buttermilk in place of plain milk: add 1/2 cup (122 grams) of buttermilk and 1/4 teaspoon (1 gram) of baking soda to the rest of your ingredients for an easy substitute for 1 teaspoon (5 grams) of baking powder. So, for this recipe, I think I’d combine 3/4 cup buttermilk with 3/8 teaspoon of baking soda, since the recipe only calls for 3/4 cup milk. Please let us know how it works out for you!
Can I make a bundt cake with this recipe. It looks good and I don’t want to mess it up.
Hi Judith! Thank you so much for your inquiry! We have never made this cake in a bundt pan, but I see no reason why it wouldn’t work. It will take a bit longer to bake than the layer cake pans will, but I am not sure how much longer. I am also sure that you could bake it in a 9×13 inch baking pan, also, if you’re nervous about baking a layer cake. The 9×13 will probably take a little bit longer than the layers would, but not as much as a bundt pan, due to the thickness. Here is an article I found regarding swapping pans for cake recipes! Cake Pans and Baking Time
Good luck and please keep us posted on how it turns out!
Suz and Courts
I just made this beautiful cake and let me tell you, it’s the best Strawberry Cake recipe I have ever had! I did get a little confused when I sifted the dry ingredients together. I added the sugar as well before reading ahead. Still turned out wonderful! Thanks so much for this recipe.
Hi Jenna! Thank you for your comment! We are so happy that you loved this cake. It’s a fun project and a big undertaking, but we also think it’s worth the time, since it has such a wonderful strawberry flavor! I am sorry about the confusion on the sugar and when to add it! I have re-worded the recipe to avoid that confusion in the future. I’m so happy that the cake turned out well in spite of that confusing part! Please let us know if you try any of our other recipes! Enjoy the weekend!